How to Clean a Litter-Robot 3
To clean a Litter-Robot 3, empty the waste drawer, unplug the unit, remove the globe and liner, wash the removable parts, wipe the base, and dry everything fully before reassembly.
On this page (12 sections)
- What should you do before cleaning a Litter-Robot 3?
- How do you empty a Litter-Robot 3?
- How do you take apart a Litter-Robot 3 safely?
- How do you clean the Litter-Robot 3 globe?
- How do you clean the Litter-Robot 3 liner?
- How do you clean the Litter-Robot 3 base?
- What helps keep the area around the unit clean?
- Can another litter system replace a Litter-Robot 3?
- How do you clean litter around a covered box?
- How do you reassemble and restart a Litter-Robot 3?
- How often should you clean a Litter-Robot 3?
- What is the safest cleaning decision?
To clean a Litter-Robot 3, empty the waste drawer, unplug the unit, remove the globe, wash the removable parts, wipe the base, and dry everything completely before putting it back together.
That simple order matters because waste left in the drawer can spill during disassembly, and power left on can cause a cycle while parts are loose.
Routine cleaning keeps waste from building up around the globe, liner, drawer, and waste chute, where it can stick and make later cleaning harder.
It also helps you spot worn or damaged parts early, before a small issue turns into a bigger mess or a skipped cleaning cycle.
A quick wipe during regular emptying is different from a full deep clean, and mixing the two can leave residue behind.
Deep cleaning is best done at a steady pace, with each part washed, rinsed, and dried on its own terms rather than rushed back into place.
This approach suits owners who want the unit to run smoothly between cycles without scrubbing the same stubborn spots each time.
For a newer model, see our guide to how to clean a Litter-Robot 4.
If you are unsure which model you have, check the name on the unit before you start, since parts and steps can differ.
Taking a few quiet minutes to prepare the space and supplies will make the whole task calmer for you and less unsettling for your cat.
What should you do before cleaning a Litter-Robot 3?
Prepare a clean work area, waste bags, mild cleaner, soft cloths, and a way to dry the parts. Read the Litter-Robot 3 manual before removing any component that you are unsure about.
Move the unit to a place where spilled litter is easy to sweep up. Keep electrical parts away from water, and don't begin while the unit is connected to power.
If you are installing the unit for the first time, our guide to how to set up a Litter-Robot explains the basic placement and preparation steps.
How do you empty a Litter-Robot 3?
Remove the waste drawer first, seal the waste, and clear loose litter from the drawer area. Emptying the drawer prevents spills when you move or turn the unit.
Check the drawer, waste chute, and nearby floor for stuck clumps. Use a dry cloth or disposable towel to collect loose litter before introducing any moisture.
For a separate emptying walkthrough, follow our guide to how to empty a Litter-Robot. Do not force the drawer if it catches.
Look for litter or waste blocking its path.
How do you take apart a Litter-Robot 3 safely?
Unplug the Litter-Robot 3, remove the bonnet and globe as directed, and set each part on a protected surface. Keep small pieces together so you know where they belong during reassembly.
Take a quick photo before removing unfamiliar parts. This gives you a simple reference for the order and position of the components.
Don't pull on wires or rinse the base. The globe, bonnet, liner, and waste drawer can be handled separately, while the base needs careful surface cleaning.
How do you clean the Litter-Robot 3 globe?
Remove loose litter, wash the globe with a soft sponge and mild cleaner, then rinse away residue and dry it fully. Pay close attention to the openings, corners, and areas where litter collects.
Avoid abrasive pads and sharp tools. Scratches can make future cleaning harder, while trapped moisture can mix with fresh litter and create clumps.
Let the globe air-dry or wipe it with clean towels. It must be completely dry before you return litter and restart the unit.
How do you clean the Litter-Robot 3 liner?
Wipe the liner gently and inspect it for tears, peeling, or stuck waste. A damaged liner can make cleaning harder and may allow waste to reach areas that are difficult to wipe.
Use a soft cloth or sponge rather than a stiff brush. Work around the edges and seams without digging into the material.
The right liner matters during routine care. See which globe liner fits your Litter-Robot before replacing a worn part.
How do you clean the Litter-Robot 3 base?
Clean the base with a lightly damp cloth, keeping water away from electrical openings and controls.
Remove loose litter first so it does not turn into wet debris that smears across the surface and hardens in corners.
Work with a dry cloth or paper towel for the first pass, especially around the waste chute and drawer rails where clumps often collect.
Once loose material is gone, use a lightly damp cloth with a mild cleaner suited to the manual, and keep it only slightly wet.
Wipe the waste chute, drawer rails, exterior surfaces, and accessible corners, taking care around seams and any controls.
Use a second clean cloth to remove cleaner residue, since leftover soap can attract litter and leave a film over time.
Never submerge the base or pour water into it, as moisture near electrical parts can cause damage that a simple wipe would avoid.
If waste has reached an enclosed area, stop and follow the manufacturer's cleaning instructions rather than taking apart electrical components.
Let the base air dry and check that no moisture remains near openings before you return the drawer and reconnect power.
That dry finish protects the unit and gives fresh litter a clean surface to sit on when you restart it.
What helps keep the area around the unit clean?
A mat helps collect litter that leaves the box on your cat's paws. Compare options in our guide to the best litter robot mat.
The PetSafe ScoopFree Disposable Crystal Litter Tray Refills are designed for PetSafe ScoopFree self-cleaning cat litter boxes, not the Litter-Robot 3. Their 3-pack contains fresh-scent, 99% dust-free crystal trays with leak-resistant plastic lining.
Choose a mat based on the space in front of your unit and how easily you can lift it for sweeping. A mat reduces loose litter around the box, but it does not replace drawer and globe cleaning.
Can another litter system replace a Litter-Robot 3?
No, a different litter system should not be treated as a replacement part for a Litter-Robot 3. Automatic boxes use their own globe, waste path, litter area, and cleaning process.
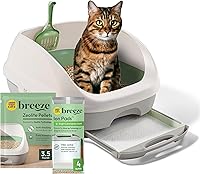
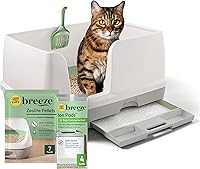
The Purina Tidy Cats Breeze Cat Litter Box System Kit with Pellets & Pads is an open box system with Zeolite pellets, Ion litter pads, a scoop, and a litter box. The pellets let urine pass to the pads while solid waste stays available for removal.
Its system uses disposable pads and non-clumping pellets, so its care routine differs from a rotating globe. Compare the waste handling, cleaning access, and ongoing supplies before changing systems.
For general operation guidance on the newer model, read how to use a Litter-Robot 4. The basic lesson is the same: understand the waste path before cleaning or changing supplies.
How do you clean litter around a covered box?
The Nature's Miracle Hooded Flip Top Cat Litter Box With Charcoal Filter is a standard front-entry box with a hooded enclosure, built-in charcoal filter, simple latches, and a flip-top front opening.
Its 25.13 x 19.13 x 11.75 in dimensions help show why floor space matters when comparing litter-box styles. Measure the area before choosing a different box, including room to open the front and remove litter.
A hooded box still needs regular waste removal and surface cleaning. Privacy features and a charcoal filter do not eliminate the need to wash the box when residue builds up.
How do you reassemble and restart a Litter-Robot 3?
Reassemble the dry parts in the correct order, add the appropriate litter, replace the drawer, and reconnect power only after checking the unit. Make sure the globe and bonnet sit correctly and that no cloth, towel, or loose litter remains inside.
Check that the waste drawer slides in without resistance. Confirm that the liner is positioned properly and that the globe can move without catching.
Run the unit according to the normal operating instructions. If it makes an unusual sound, stops, or shows an error, unplug it and consult the manual before repeated cycles.
How often should you clean a Litter-Robot 3?
Do a quick check whenever you empty the drawer and deep clean when residue appears on the globe, liner, chute, or base. The right interval depends on the number of cats, litter type, and how much waste reaches surrounding surfaces.
A simple routine looks like this:
- Empty the waste drawer and remove loose litter.
- Wipe the drawer area and waste chute.
- Inspect the liner for damage or buildup.
- Deep clean the globe and removable parts as needed.
- Wipe the base without soaking it.
- Dry all parts before reassembly.
To understand the sensing cycle behind automatic cleaning, read how automatic litter boxes know when to clean. Cleaning the unit does not replace checking whether a cycle completed correctly.
What is the safest cleaning decision?
Clean the removable Litter-Robot 3 parts with mild methods, keep the base dry, inspect the liner, and never restart the unit while moisture remains. That sequence protects the machine and makes future maintenance easier.
Pick a mat if loose litter is the main issue. Compare another litter system only if you are ready for a different waste and supply routine.
When the unit is clean and dry, keep the drawer accessible and check the globe during regular emptying. For daily operation questions, start with how to use a self cleaning cat litter box.
Frequently asked questions
How often should you deep clean a Litter-Robot 3?
Deep clean a Litter-Robot 3 when the globe, liner, or waste area needs more than a quick wipe, or according to the care schedule in your manual. Empty waste first, unplug the unit, wash removable parts, wipe the base without soaking it, and let every part dry before reassembly.
Can you wash the Litter-Robot 3 base?
Do not soak or submerge the Litter-Robot 3 base. Unplug it, remove loose litter and waste, then wipe the surfaces with a lightly damp cloth and an appropriate mild cleaner.
Keep moisture away from electrical openings, controls, and the underside.
How do you clean the Litter-Robot 3 liner?
Remove loose litter, then clean the Litter-Robot 3 liner with a soft cloth or sponge and a mild cleaner approved by the manual. Rinse or wipe away residue as appropriate, inspect for tears or peeling, and let the liner dry completely before adding litter.
Should you empty the Litter-Robot 3 before cleaning it?
Yes, empty the Litter-Robot 3 waste drawer and remove loose litter before deep cleaning. This keeps waste from spilling during disassembly and gives you a clear view of the globe, liner, drawer, chute, and base.
Keep the unit unplugged until cleaning and drying are complete.